Lisa Call’s Abstraction Class

After considering taking an online art class with Lisa Call for over a year, I finally made the commitment and joined her fall 2014 Abstraction class. I had heard many good things about Lisa’s classes and was anxious to study with her. I am not sure exactly what guided me to take a class in abstract art. Frankly, many types of abstract art do not appeal to me. However, I was looking to find a way to discover more about myself and to learn how to express ideas in my own unique way.

Taking Lisa’s Abstraction class was a real eye-opener for me. I learned about Abstraction art and the various art movements and studied the works of the influential artists of those “isms”. I practiced basic design principles in relationship to the studies done for the class assignments and I discovered how to critique my own work by taking the time to really look at it and write down by thoughts. But most importantly I learned more about myself – what kind of work I like to do, how to take inspirations and translate them into finished work, how to quiet the critic within, my preferred methods of working, and the whispers of a “voice” that will guide me forward.

Initially I worried I would not have enough time to devote to the class work. (“Maybe I should take the class at a later time….This is such a busy time in my life….Can I handle the assignments?….etc.) But I was drawn to sign up and I am so glad I did. There are always excuses to not do something but I realize that taking this class was important to me as I work to find meaning and direction by creating with the skills and techniques I have honed over the years.

Lisa is a very positive, sharing teacher who continually encourages her students to explore and grow. I like how the class was structured with weekly e-mails, assignments, recorded lectures, group and individual calls. It was very interesting to see how each individual approached the assignments and found their way. Because Lisa’s class was online and was 10 weeks long, I felt that I learned more than I would have if I had taken an in-person workshop or retreat. There was time to digest the material and the challenges kept me moving forward and engaged. The group and individual calls provided the personal attention and gave several opportunities to ask questions or request specific feedback.

Here are photos of my completed assignments. It is very interesting to me how my work changed and how much more comfortable I became as I worked through each challenge.

Abstraction Class assignments

Abstraction Class assignments

Now that I have completed the class, I find myself with a new direction that I want to focus on and explore in my work. I am excited to have found a technique that excites me and am anxious to see where “action stitching” may lead.


Ribbon Petal Cockade Tutorial by the “Ribbon Whisperer”

While I was lolling at the beach last week, the folks at Sew4Home were hard at work and posted a tutorial I had written for them before I left for vacation. Click here to see the complete tutorial for how to make a ribbon petal cockade, similar to the one featured on the cover of my book How to Make 100 Ribbon Embellishments.

Ribbon Petal Cockade

Ribbon Petal Cockade

This cockade is built with three layers of ribbon sewn to a buckram circle. The first row is made with folded loops.

Row 1 - Folded Ribbon Loops Stitched to a Buckram Circle

Row 1 – Folded Ribbon Loops Stitched to a Buckram Circle

The next row is comprised of overlapped ribbon loops.

Row 2 - Overlapped Ribbon Loops Stitched Between the Folded Loops of Row 1

Row 2 – Overlapped Ribbon Loops Stitched Between the Folded Loops of Row 1

A gathered rosette fills in the center and covers all the raw ribbon ends of the loops..

The Third Layer is a Gathered Ribbon Rosette Stitched to the Center to Cover all the Ends of the Ribbon Loops

The Third Layer is a Gathered Ribbon Rosette Stitched to the Center to Cover all the Ends of the Ribbon Loops

And a coordinating decorate button is sewn to the center of the cockade to cover the center of the gathered rosette.

I get such a kick out of Liz Johnson of sew4home.com when she calls me the “ribbon whisperer”. That just makes me giggle. Actually, I don’t think I am the one doing any whispering to make the ribbons do what I want them to do. In every case, the ribbons are doing the talking (much louder than a whisper!).

These three beautiful Amy Butler ribbons by Renaissance Ribbons were actually shouting to be made into this large cockade. These beautiful coordinates are woven jacquard ribbons with a pronounced right and wrong side. So I knew that I had to select techniques that would only allow the front of the ribbons to be visible in the completed embellishment.

Other techniques incorporate folding and manipulation where both sides of the ribbon will show. Solid vintage Petersham ribbons, have a wonderful “hand” and pleat beautifully so they “whisper” to be made into folded ribbon cockades or manipulated trims. Woven stripes also appear the same on both sides and work for these types of techniques.

Folded and Manipulated Ribbon Cockades and Trims

Folded and Manipulated Ribbon Cockades and Trims

I invite you to take a look at the techniques featured in How to Make 100 Ribbon Embellishments. Then go and listen to the ribbons in your stash and see what they are “whispering” to become.

Crazy Quilting….in a Modern Way

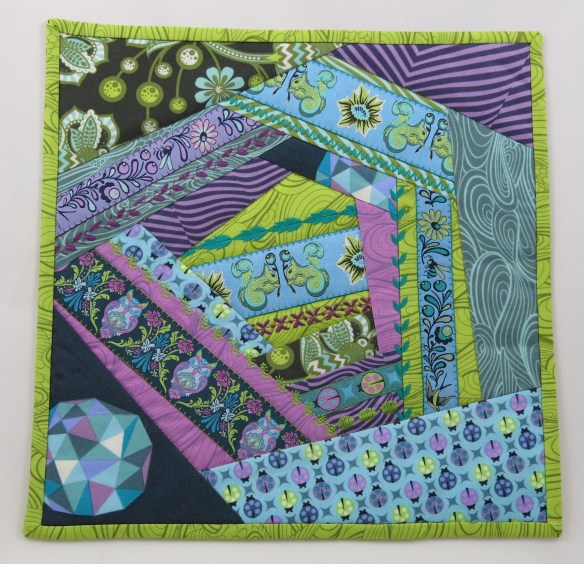
TulaCrazyMiniQuilt For awhile now I’ve been thinking of how I could do some crazy piecing and quilting, but in a more modern way, taking advantage of some of the neat tools the Victorian ladies did not have at their disposal – like cutting templates and rotary cutters and sewing machine with lots of and lots of built-in decorative stitches.  When Renaissance Ribbons sent me a few small pieces of their new Tula Pink ribbons, I was inspired to get a little crazy….in a modern way!

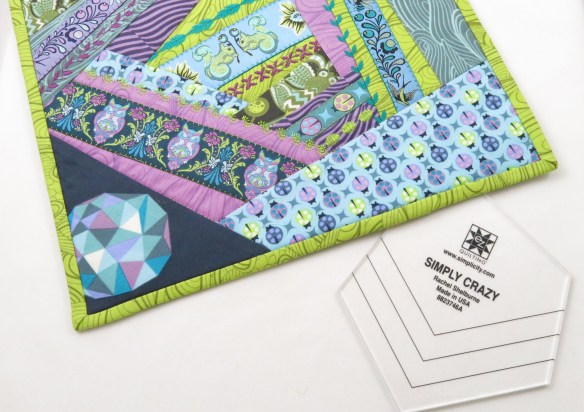
Tula’s ribbons are fun and colorful and coordinate beautifully with her Free Spirit Birds & Bees fabrics.  Since I wanted to keep this block fast and easy, I got started with my EZ Quilting Simply Crazy tool.   Love this little template!TulaCrazy&Tool

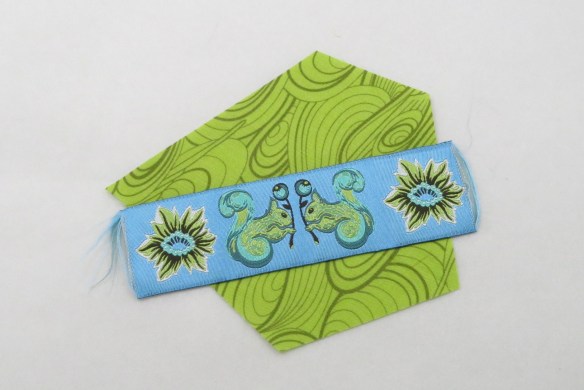
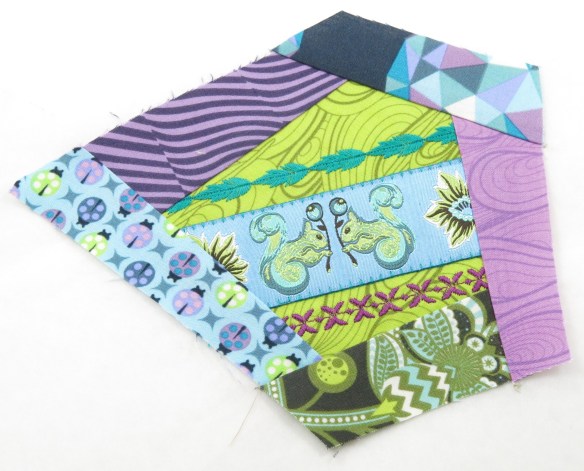
Following the instructions with the tool, I cut out the center patch.  I placed it on a square of stabilizer and added a length of Blue Squirrel ribbonTulaCrazy1

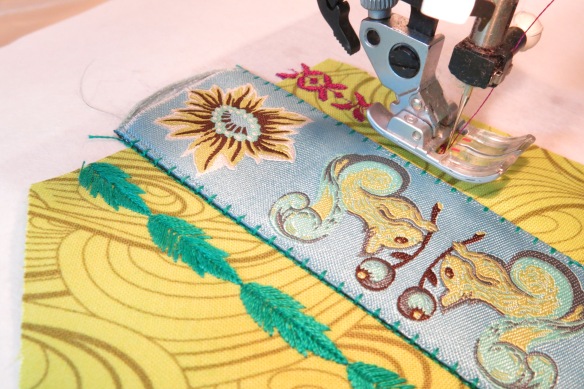
Then is was time to sew a few rows of decorative machine stitching.  I have so many of these pretty stitches on my machine but I never use them so it was fun to look through them all and select a few to add. TulaCrazy2

Once the center patch was stitched, I added a row of random patches around it.  TulaCrazy6

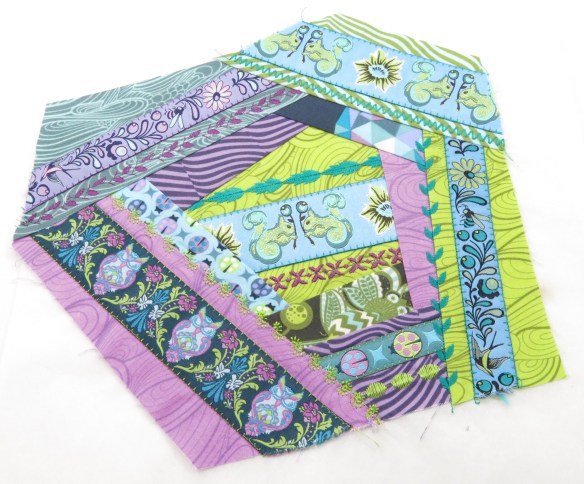
The second row around I added more ribbons and stitches along with the fabrics.TulaCrazy7

Just a few more patches to finish out the corners, and my block was finished.  Now I can’t wait to make an entire quilt with my modern crazy ribbon patchwork blocks.

Something Old & Something New Wedding Pillow

Turns out I am the keeper of our family’s textile treasures.  I have drawers and drawers full of beautiful vintage linens, fabrics, ribbons and trims that at one time were lovingly handmade and used by past generations in our family.  Although some things are not in great condition, I have saved each little bit knowing that one day I would find the perfect use for them.  So when my niece got married last month, I knew it was a wonderful chance to work with my stash and make her and her husband a little gift to remember her family.

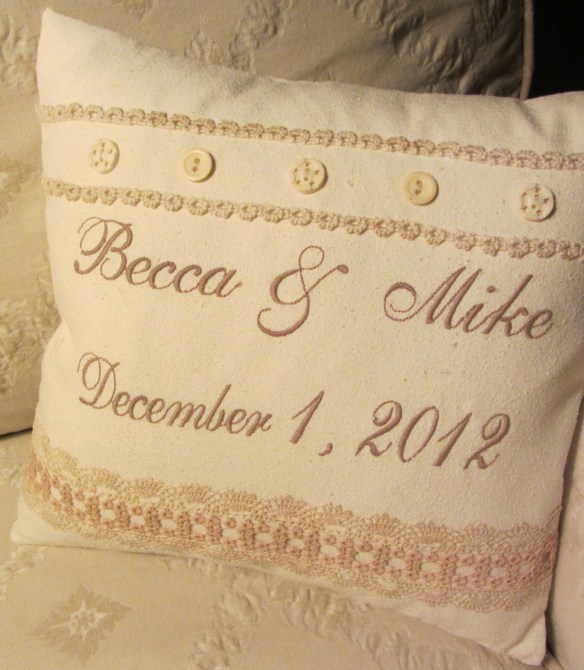
Machine Embroidered Wedding Pillow with Vintage Tatting and Buttons

Machine Embroidered Wedding Pillow with Vintage Tatting and Buttons

But unlike ladies of the past who spent hours making tatted and crocheted lace by hand, I had waited to the last minute to make this gift and was short on time to get it finished.  Let’s hear it for today’s technologies!  Working with my computer and machine embroidery software, I typed out the bride and groom’s names, transferred it to my sewing machine, threaded up the machine and stitched it onto a piece of raw silk fabric that great-gran must have used for curtains.  I washed the fabric before stitching the embroidery as I wanted to make sure the finished pillow could be cared for easily in the future.  The washing softened the fabric and brought out the texture of the weave.  A nice contrast to the cotton embroidery thread.

Machine embroidery done (so much faster than stitching by hand!) and ready to clip the threads.

Machine embroidery done (so much faster than stitching by hand!) and ready to clip the threads.

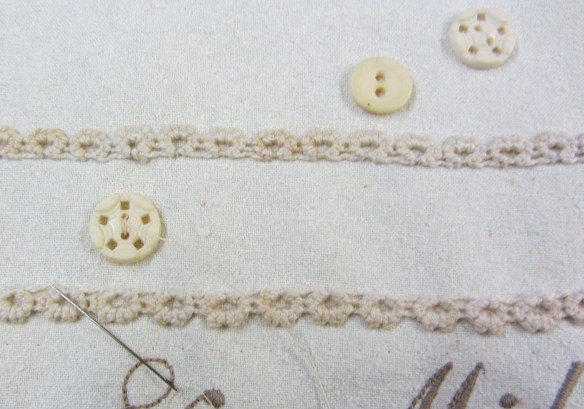
I found a gorgeous strip of tatted lace that was still attached to part of a silk chemise top.  It was one of the shoulder straps.

Tatted Lace Shoulder Strap on Silk Chemise Top

Tatted Lace Shoulder Strap on Silk Chemise Top

The silk fabric was very fragile and falling apart but the lace was in great shape.  So I carefully clipped it from the fabric and washed it by hand.  After it was dried and pressed, it was even more beautiful.

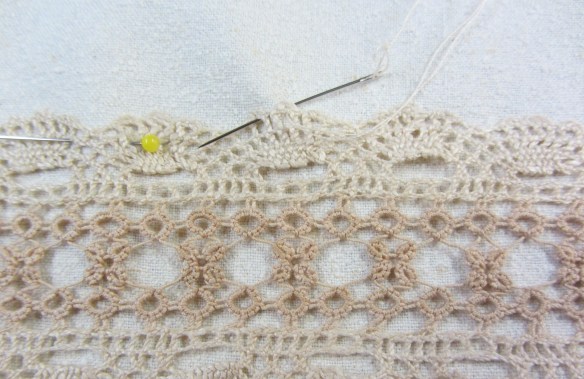
LaceDetailI hand stitched the lace below the embroidery…StitchingLace

…added a two more rows of narrow tatting above the embroidery….

Another modern tool makes sure my top rows of lace are straight and evenly positioned.

Another modern tool makes sure my top rows of lace are straight and evenly positioned.

…and sewed on a few vintage buttons from my stash.

Buttons

Didn’t take much time to then make the pillow cover and insert the pillow form.

As I worked on this project, I kept thinking of the talented ladies in generations past and what they would have thought of all the tools and technology we have at our fingertips today.  I am so glad that my husband’s great aunt had the patience and passion to make such beautiful lace and I feel honored that I could use it again to make a little reminder of how much family is part of the fabric of our lives.

Congratulations to Becca and Mike!  Many years of happiness.

Love, Aunt Elaine

Ribbon and Embroidery Christmas Stocking

The fridge is packed with Thanksgiving leftovers and the Black Friday ads are out, so now it is time to think about Christmas.  While I try to plan ahead each year, I really find it difficult to get into the Christmas spirit early (unless I am working on a book project or something for one of my clients!).  In my personal life, I like to take my holidays one at a time.

So here is a little Christmas project I want to share with you.  I designed it for the Renaissance Ribbons Quilt Market & Festival booth.  I love Sue Spargo’s holiday ribbons and I thought they might look good with a few hand embroidery stitches.  I was trying to create the feel of a richly embroidered/needlepointed Christmas stocking, but with a bit less time-consuming hand stitching.  So I sewed the ribbons down to the velveteen stocking shape with pearl cotton hand stitches and then added rows of stitching between the ribbon rows.

I used cotton velveteen for the base of the stocking and I pre-washed it. (You’ll see why shortly.)  Then I cut out my stocking shape (a basic one I have used for several projects) and fused the rows of ribbons in place to the stocking front.  For the embroidery, I chose pearl cotton, in sizes 5 and 8, but floss would certainly work too.  To make it easy to sew the stitches, keep them even and work without an embroidery hoop, I used strips of Sew Cherished crazy stitch adhesive guides.  What a cool product!  You cut the designs into strips.  They are tacky so you can stick the strips where you want the stitches to be and then sew right on top of them.  The needle slides through the adhesive paper easily and you don’t have to worry about making your stitches perfectly spaced – just follow the lines.  When you are done stitching, place the stocking shape in water and the adhesive paper will quickly dissolve.  So now you see why I pre-washed the velveteen fabric.  I was worried it might shrink.  I did not pre-wash the ribbons, although I did press them lightly to smooth them before I stitched them down.  They are polyester and will not shrink.  After the stocking front dried, I sewed the stocking back to the front and finished off the top edges by sewing a lining in place.

Of course you can use any stocking shape; the ribbons can be applied diagonally, vertically or horizontally.  I used horizontal rows at the top to give the look of a “cuff”, but that can be replaced with an embroidered name and maybe just one row of ribbon below that line.

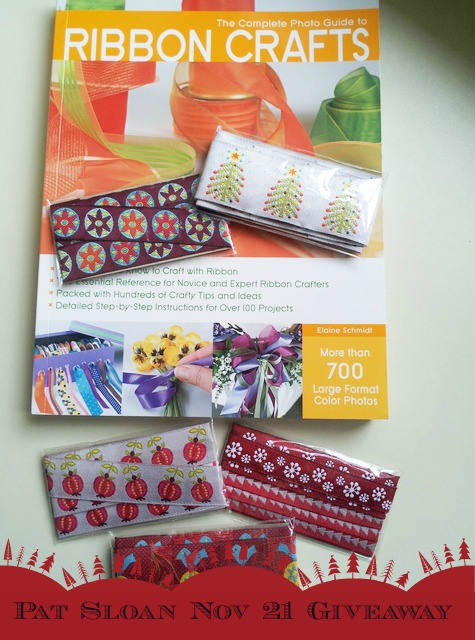
If you love these Sue Spargo Christmas ribbons as much as I do, Pat Sloan is conducting a give-away of her collection, along with a copy of my ribbon book, The Complete Photo Guide to Ribbon Crafts.  Check our her blog for the details.

Win a collection of Sue Spago’s holiday ribbon collection for Renaissance Ribbons – and my ribbon book too!

Good luck, but remember if you are not the lucky winner, the ribbons are available in the Renaissance Ribbon store and you can find my book on Amazon.

Hope you get into the Christmas spirit with a little bit of ribbon and stitch.  Have fun!

Talkin’ Ribbon with Pat Sloan on the Radio

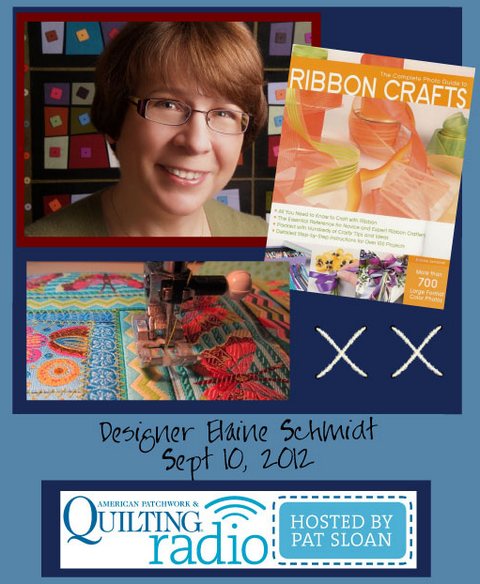
I am thrilled to be invited to be a guest on American Patchwork & Quilting Radio with Pat Sloan.  We’ll be live on the air tomorrow, Sept 10, at 4pm Eastern time, so please join us if you can.  I love to listen to Pat’s online radio show, especially when I am working on a project in my workroom.  It always feels like a bunch of quilting and sewing friends have stopped by for a visit…kindred folks sharing their passions and discoveries.

Pat and I are going to talk about my book, The Complete Photo Guide to Ribbon Crafts, with special emphasis on my favorite section – Sewing with Ribbons.  Since the book was written, I have continued to experiment with a variety of sewing and quilting projects that are enhanced with a touch of ribbon.  I plan on sharing some tips for sewing and quilting with ribbons and also on my Lazy Log Cabin Patchwork technique.

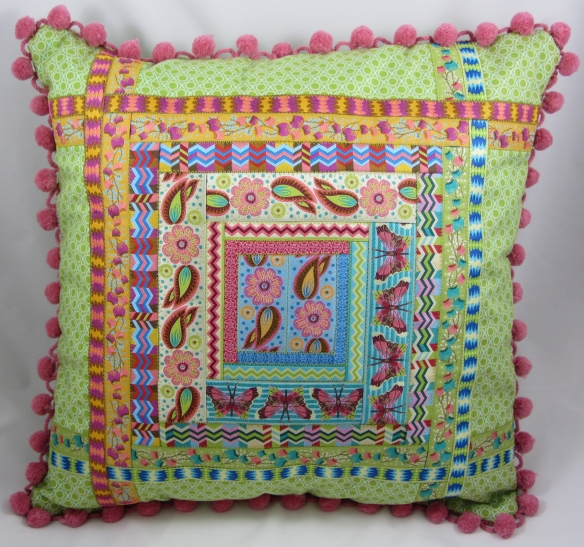
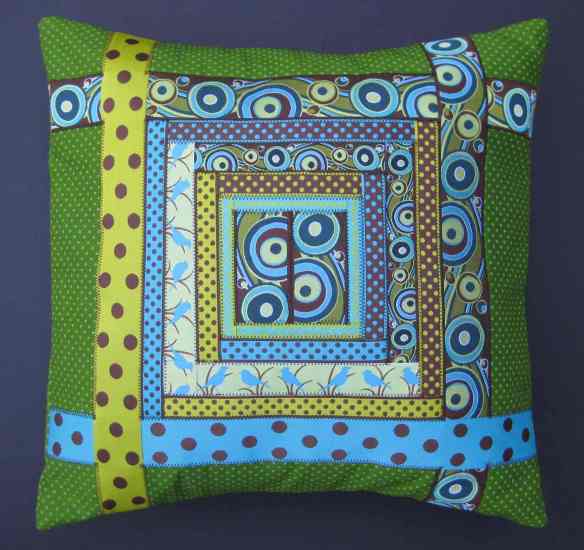
Lazy Log Cabin Ribbon Patchwork Pillow made with Anna Maria Horner ribbons by Renaissance Ribbons

The show airs live on Mondays at 4pm Eastern time, but you can click on the replay button below and listen to it anytime.  I hope you can join us live or anytime you need a little company as you work on your projects.  It’s such fun to be a part of this great big friendly sewing and quilting world.  Lovely to know we are all just a click away.

Lazy Log Cabin Ribbon Patchwork

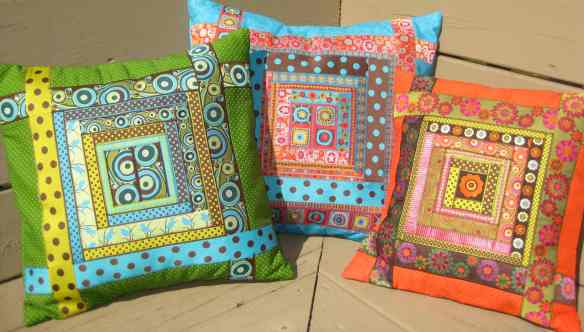
Lazy Log Cabin Ribbon Patchwork Pillow

One of my favorite techniques that I featured in my book, The Complete Photo Guide to Ribbon Crafts, is ribbon patchwork.  I call this the Lazy Log Cabin pattern because it really is a short-cut version of a traditional pieced patchwork block.  Except, I am not doing any piecing with different fabrics.  I am using rows or ribbons, placed side-by-side, to imitate the look.

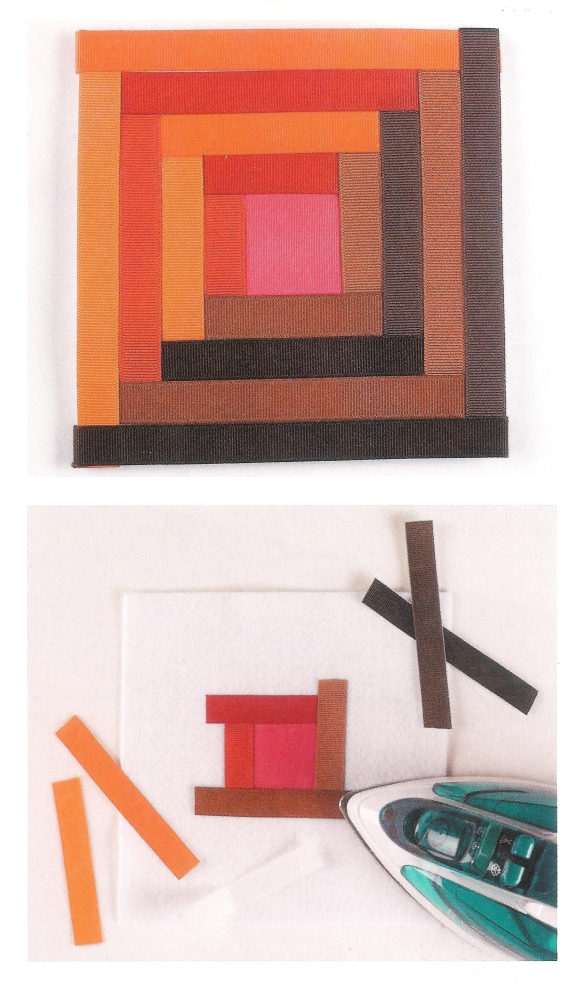
Page 158 from “The Complete Photo Guide to Ribbon Crafts”

The block starts with a center square of ribbon that is fused to a base fabric.  Surrounding rows of ribbon are then positioned around the square in rows.  Each row covers the raw cut edges of the previous row, creating a very quick and neat log cabin patchwork.  Machine zigzag or decorative overcast stitches can be sewn along all the edges, where the ribbons abut.

With all the beautiful woven jacquard ribbons available, it is so much fun to mix and match different patterns and colors of ribbon to make a lazy log cabin block.  The ribbons can be cut so as to engineer the placement of a special motif in the center of the block.  The outside rows of ribbon can extend out to the edges of the project so they can be caught in a seam or folded back to the wrong side.

Here are is a Lazy Log Cabin Pillow tutorial I did for Fairfield Processing, using a variety of Renaissance Ribbons.  This is a great project for using up bits and pieces of ribbons you may have leftover from other projects.  Of course the blocks can be used for projects other than pillows – maybe the center of a wall quilt or the front of a tote bag?

I think it is perfectly fine to be a little “lazy” from time to time….