
It’s hard to believe our granddaughter is 6 months old. She is growing so fast…including her head, which means that she has outgrown all her cute baby headbands. Last week I decided to take a day, pull out my stash of ribbons and buttons and embellishments, and make her a wardrobe of headbands. I created a total of 14 different styles – two weeks of stylin’ baby accessories.
Here she is ready to watch basketball, wearing her College Game Day bow!

Ready for College Game Day – Go Nova!
And here are the 13 other headbands:

The Many Faces of Claire – and her Headbands!
There is so much info online on how to make elastic baby headbands that I do not think I need to write a tutorial. But, I do have a few tips to make them fit a growing head a little longer.
Th 5/8″ fold-over elastic by Dritz is great for these types of headbands. It’s soft, easy to work with, and comes in lots of different colors and patterns. Most tutorials suggest taking a length of elastic, placing the ends right sides together, and sewing them together to make a seam. I find that a little bulky so I simply overlap the cut ends.
I start with a length of elastic cut to the size of baby’s head plus 1/2″. There are “standard” head sizes but our girl is off the charts (So smart, she is…gonna be brilliant in school!). I want to make sure the headbands will be big enough now and adjustable to last for awhile.
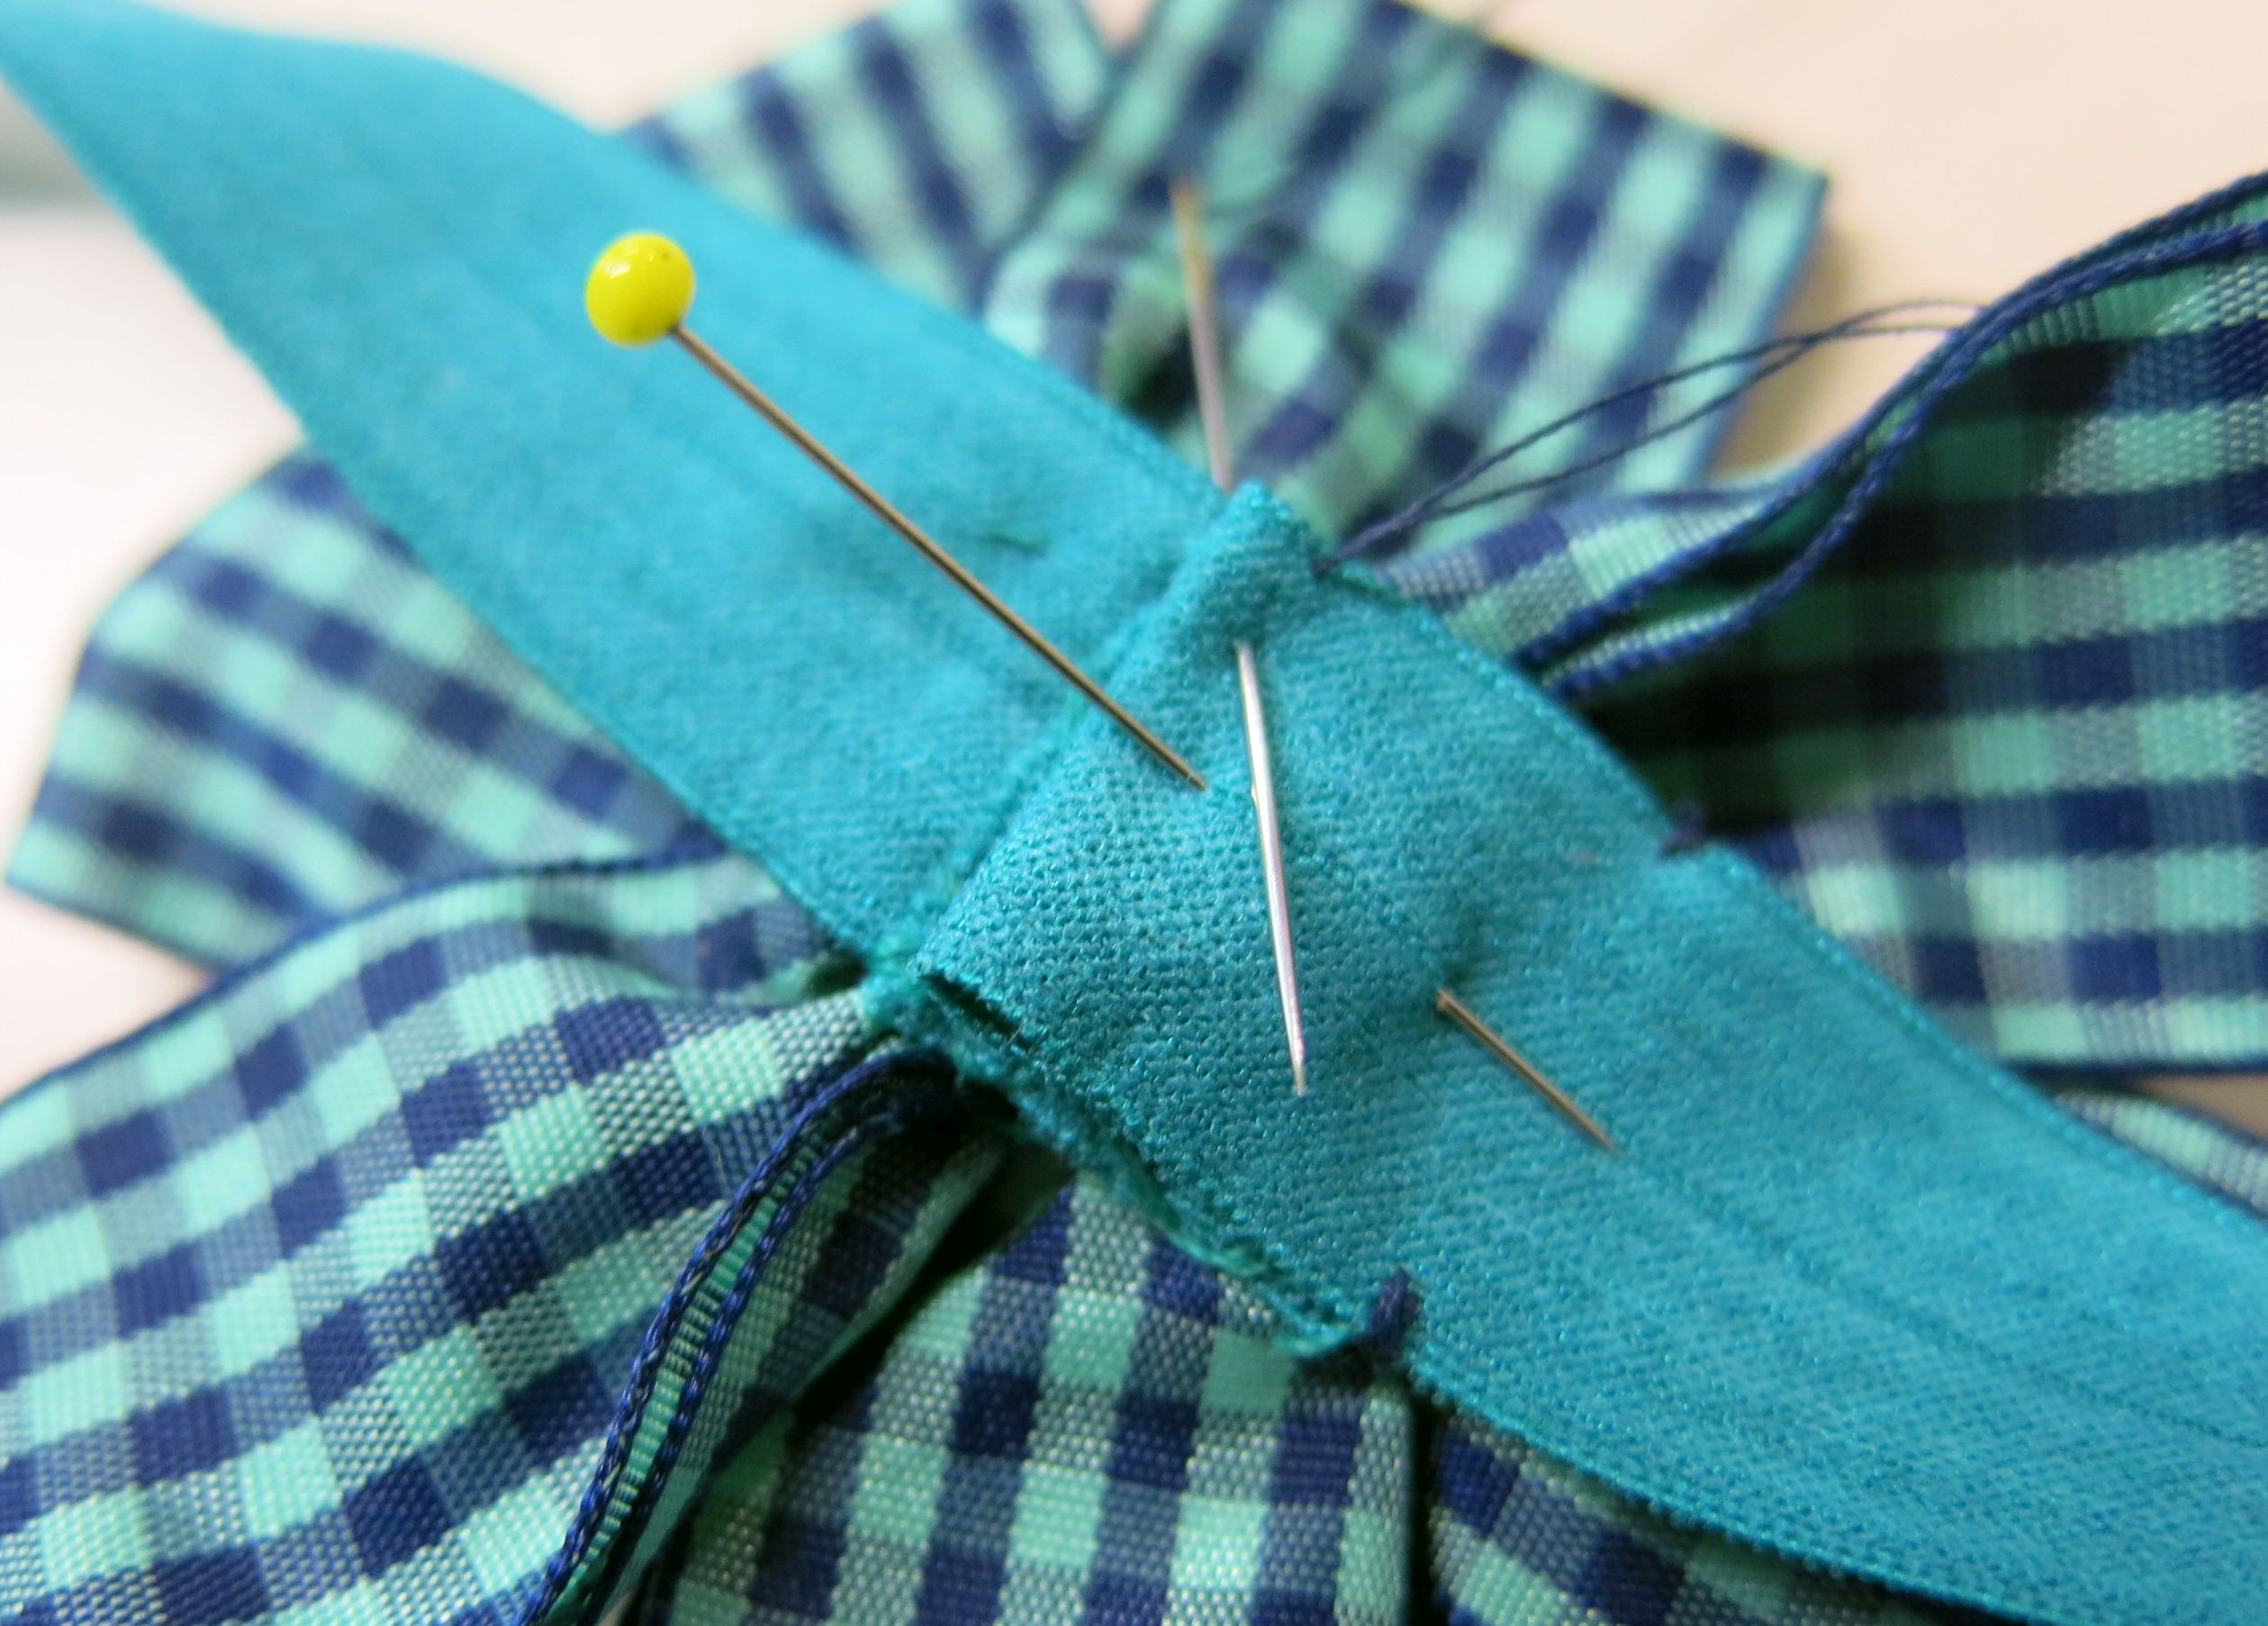
I overlap the ends 1/4″. Using a doubled thread in the needle, I hand slip-stitch one cut end in place.

Then I sew the finished edges together along one side, sew back down the other cut end and across the opposite finished edges. I take small stitches and make sure the ends are securely knotted. The desired bow or embellishment is sewn or glued to the outside of the headband, over the overlapped seam.
To make the headband adjustable to a growing head, I form a 1/2″ pleat by folding the elastic back on itself and securing it with a few small stitches. These stitches can then be removed when the headband gets a little snug. (I like to use contrasting thread so it is easy to see what stitches need to be snipped.)
When using crochet lace elastic trim such as the type I used for Claire’s College Game Day bow, I do sew a regular seam on the machine. But, I can still fold and hand stitch a little tuck to the inside of the headband to make it adjustable for a growing head. A large bow or embellishment will cover up the stitching.
Hopefully this group of headbands can be worn for several months. I have a feeling I will be making lots more. They are so quick and easy to make, and it’s so much fun to see her wearing them. A girl just cannot have too many accessories!

What a cute model! I bet a lot of the designs for the ribbon embellishments can be found in someone’s book… 🙂
Funny you should mention that…
Congratulations on the grandchildren. I have a grandson due May 3rd. I would like to make him something to go over his head. I will have to think of something and I may be able to use some of your methods.